
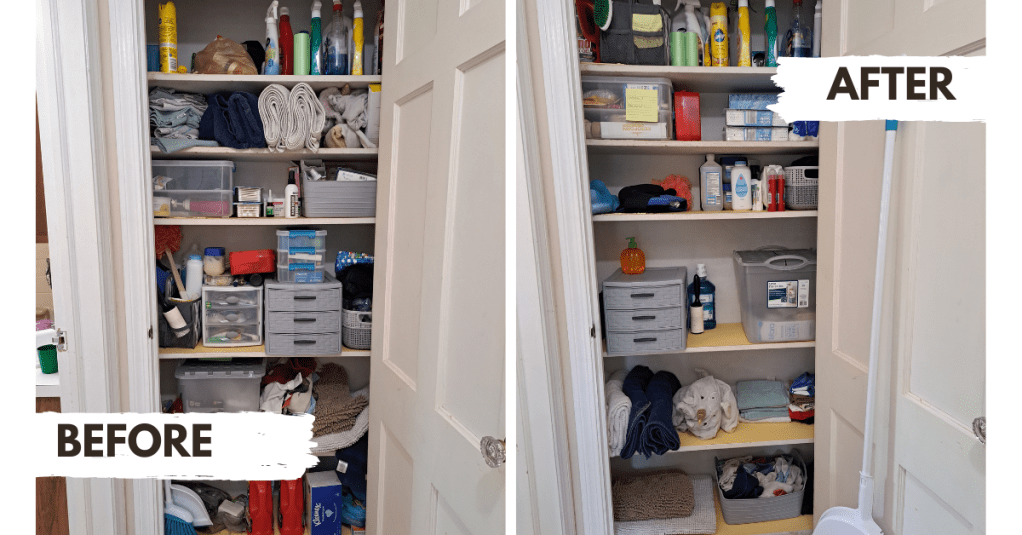
My linen closet and medicine cabinet have been driving me crazy recently! Not only have I lost track of where things are being kept, but new items have no home. Trust me — this can happen to anyone, so you’re not alone!
Before getting started I reminded myself that this was not a chore, but rather a way to bring more peace of mind when I open up my linen closet or medicine cabinet. My goal was to exchange frustration for feeling pleased when experiencing these spaces, which I do on any almost daily basis.
Step 1: Clear Out Your Space
When it comes to tackling a larger project that involves multiple spaces, getting started can be daunting. This project, like most, started with me completely clearing out both spaces. I used another room in our house to place all items from the linen closet first since it is the larger space and would take more time to go through. It’s important to note that it may be easier for you to tackle the smaller space first and give you more motivation to continue with tidying (there is no right or wrong here!).
Step 2: Categorize Your Space
Clearing out the spaces allowed me to complete step 2 (categorize your items) easily. I also sorted out items as I removed them from the linen closet. For example, I checked expiration dates, functionality, and whether or not I could see myself using the item. If items were expired, they were set aside to be thrown away. If they were functional and I could see myself using them, they were divided up into categories (more on that in a bit). If I could not see myself using them but they were still functional, they were set aside for me to handle later by donating them, giving them away to friends, etc. By going through items as I removed them from the linen closet, I saved myself the time of sorting through them again after getting them categorized. This also allows me the time to handle the other items at a later time without accidentally mixing them back in with what I actually wanted to keep.
- Towels (for cleaning and for personal care)
- Medicine (divided further into what they are for)
- Extra care items (toothcare, cotton swabs, etc.)
- First aid items
Step 3: Clean Your Space
When clearing out the spaces, I also cleared out and cleaned the storage containers I had been using. This way I get a truly fresh start to each part of these spaces. It may seem like a small step, but it is definitely an important one.
Step 4: Evaluate Your Space
Once all items were divided up into categories in my staging space, I then evaluated the storage containers I had available to me. Remember, to bring tranquility to your space you don’t need to go out and buy fancy storage containers. Sure, if you have them they can be helpful, but if you don’t you can still use what you have right in your home. For my space, I had some totes, baskets, and small drawers to work with that were already being used in the space, albeit poorly. After evaluating, I was able to use the storage items to better tidy my spaces. For example, using a basket for all of our cleaning rags, a tote for cold and flu medicines, a small drawer for extra personal care items, etc.
Step 5: Return Items to Your Space
How you store your items can also refer to where in the space you are putting them. In my home, we have two small children, so it was important for me to put items such as cleaning supplies up on the top shelf to avoid our 3-year-old accidentally getting hold of them. Items that would not harm our children, such as the towels, were stored lower. Yes, they’d definitely make a mess with them if they opened the closet, but that’s much much better than them getting into what I had stored down there originally when we first moved into our home (before our oldest was even born).
Step 6: Enjoy Your Space
There we have it! Now my family can enjoy using this small but versatile space in our home. Where it was once frustrating to find first aid items or cleaning supplies when we needed them we now have a functional space free of clutter.


Leave a comment